Barcode
Barcode is an important feature in the JOVA POS application that allows users to generate and print product barcodes. This feature is very useful for inventory management, speeding up the sales process, and ensuring transaction accuracy through barcode scanning.
Purpose of Using Barcode
Barcodes are used to:
- Manage Products: Simplifies product recording and management by giving each product a unique barcode.
- Speed Up Sales Process: The sales process at the cash register becomes faster and more accurate with barcode scanning.
- Increase Efficiency: Reduces human errors in recording and calculating product prices and stock.
- Simplify Stock and Inventory: Makes product stock management easier and monitors inventory more efficiently.
Barcode Page View
1. Barcode Page Display
After selecting the Products menu, users will be directed to the Barcode page. This page displays a list of products with their existing barcodes.
Barcode page view:
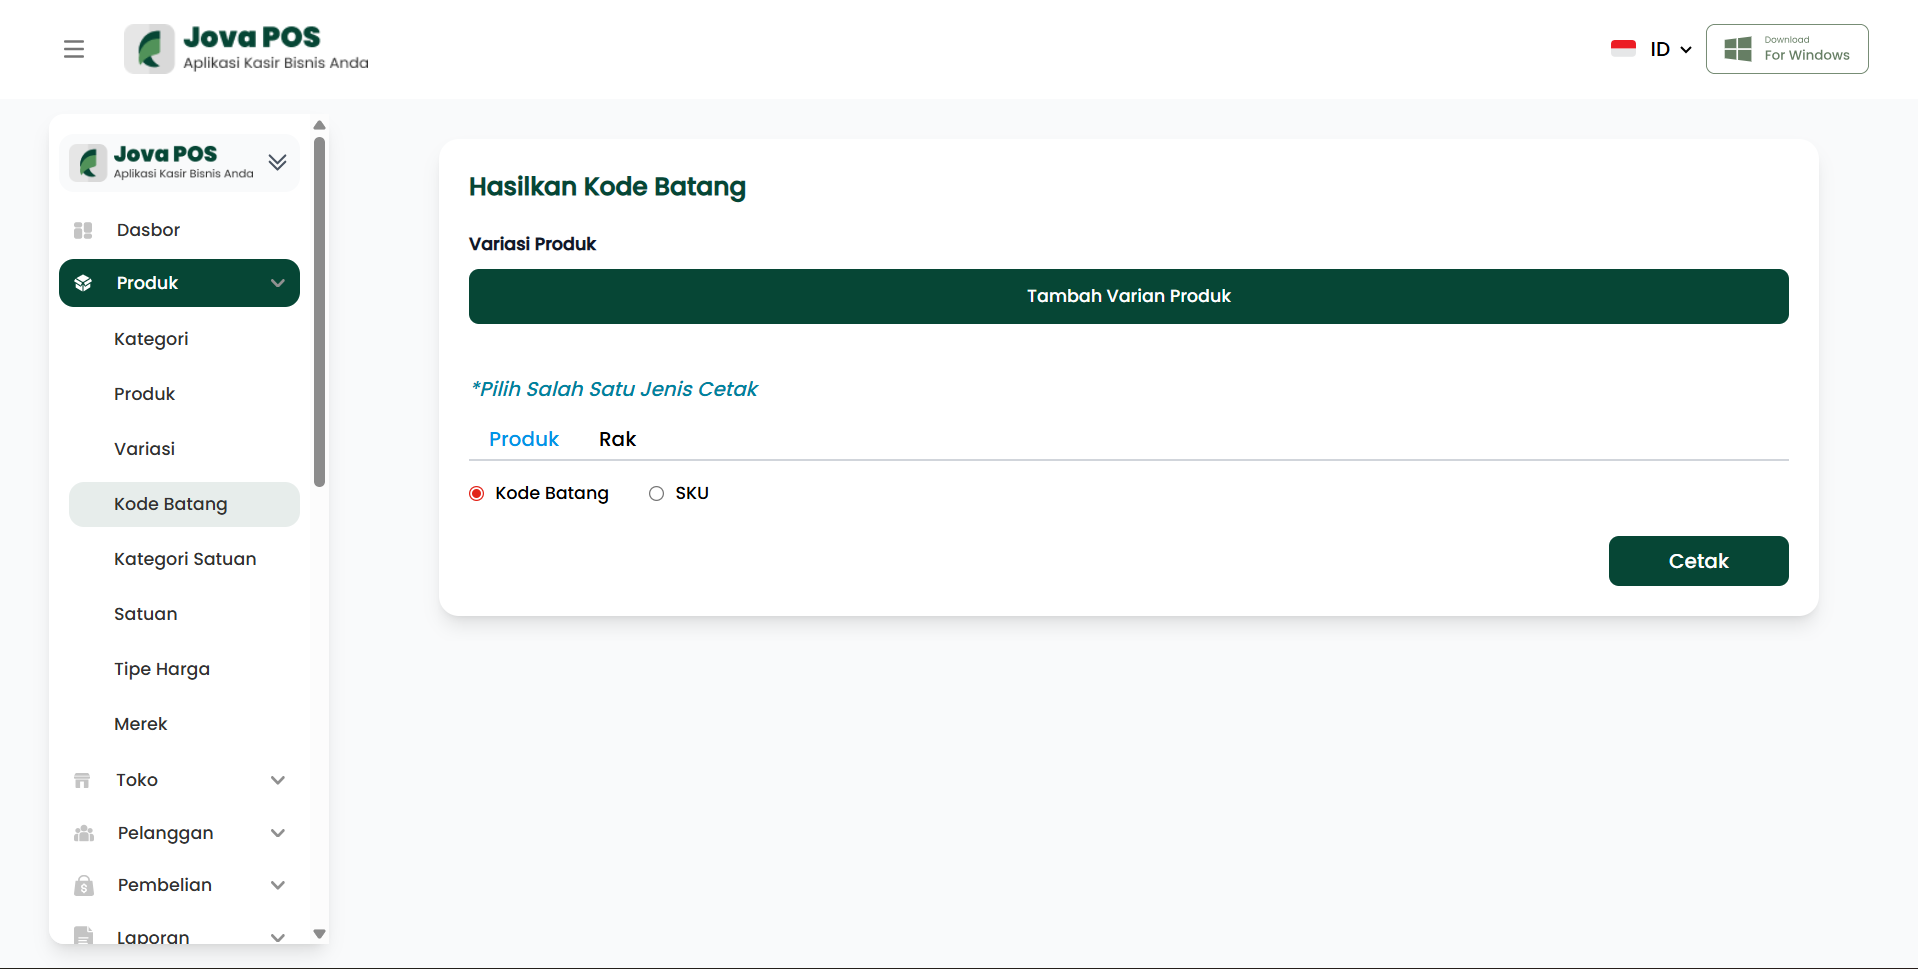
On this page, users can see products that have been assigned barcodes and are ready for printing.
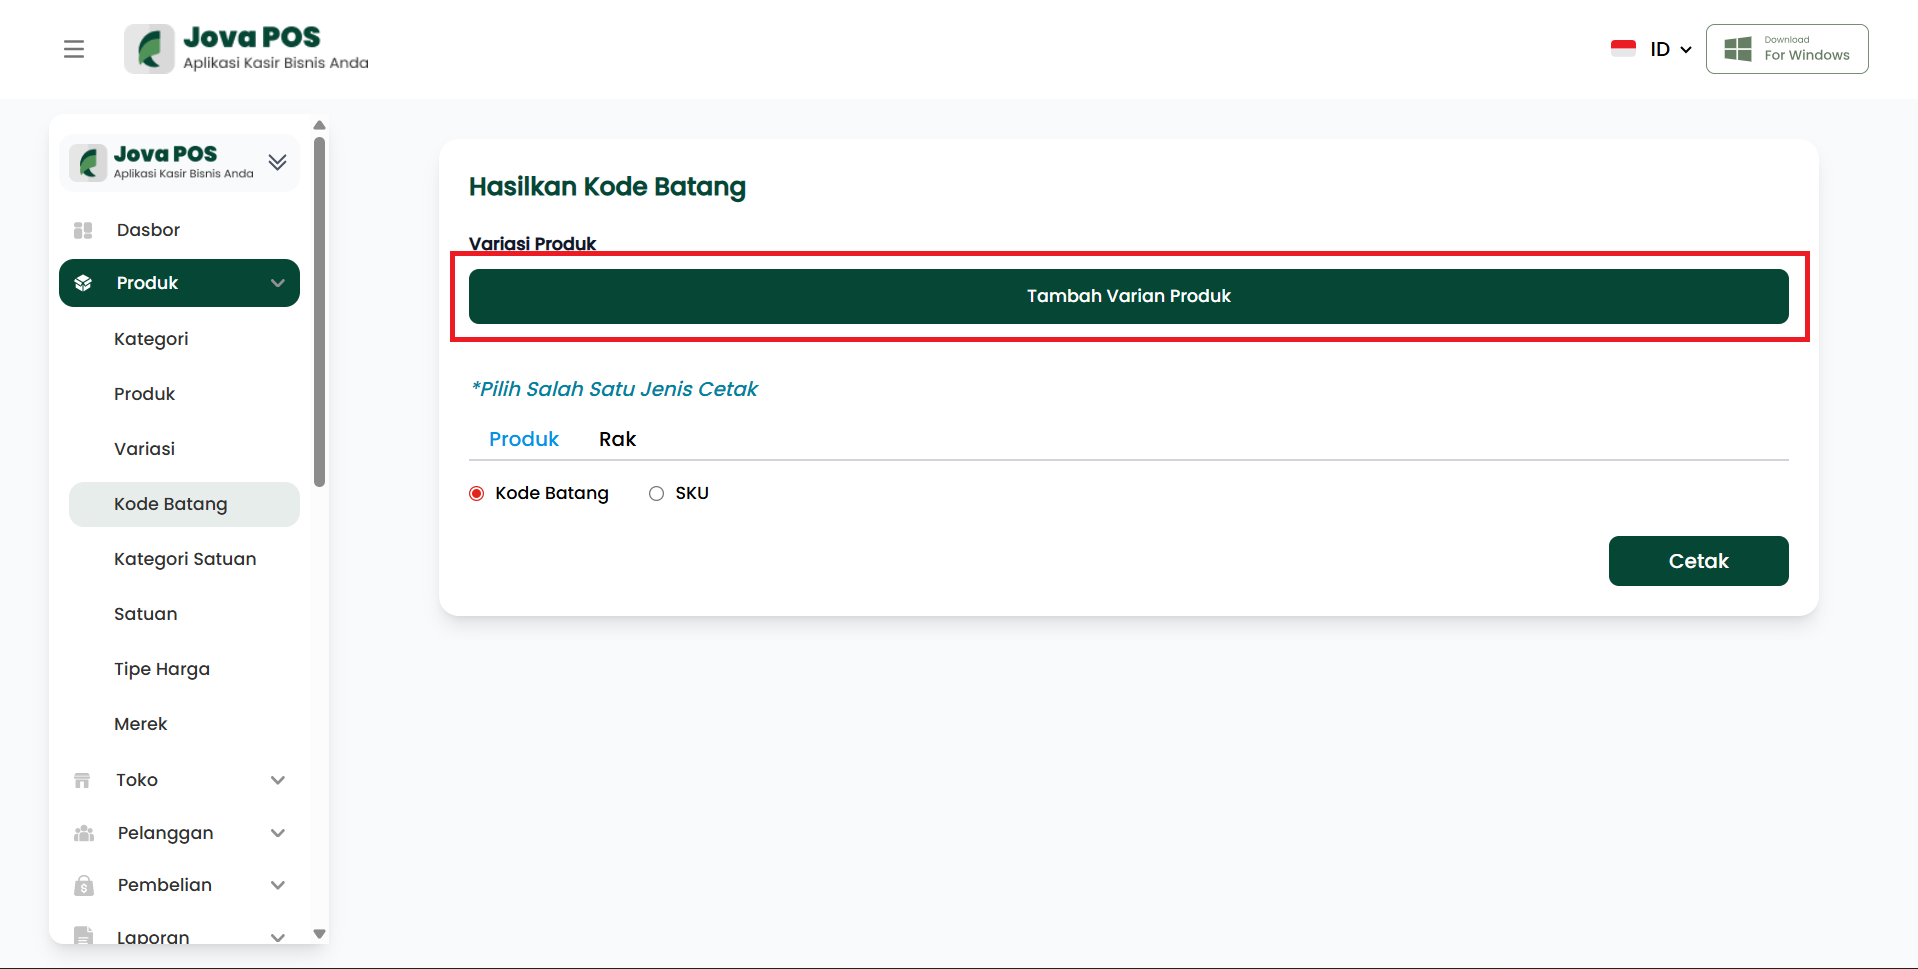
2. Click "Add Product Variant"
On the Barcode page, the first step is to select the product variant whose barcode you want to print. To do this, click the Add Product Variant button located at the top of the page.
3. Select Product Variant to Print Barcode
After clicking Add Product Variant, you will be directed to select the product variant to be assigned a barcode. Choose the appropriate product from the displayed product list.
Product variant selection view:
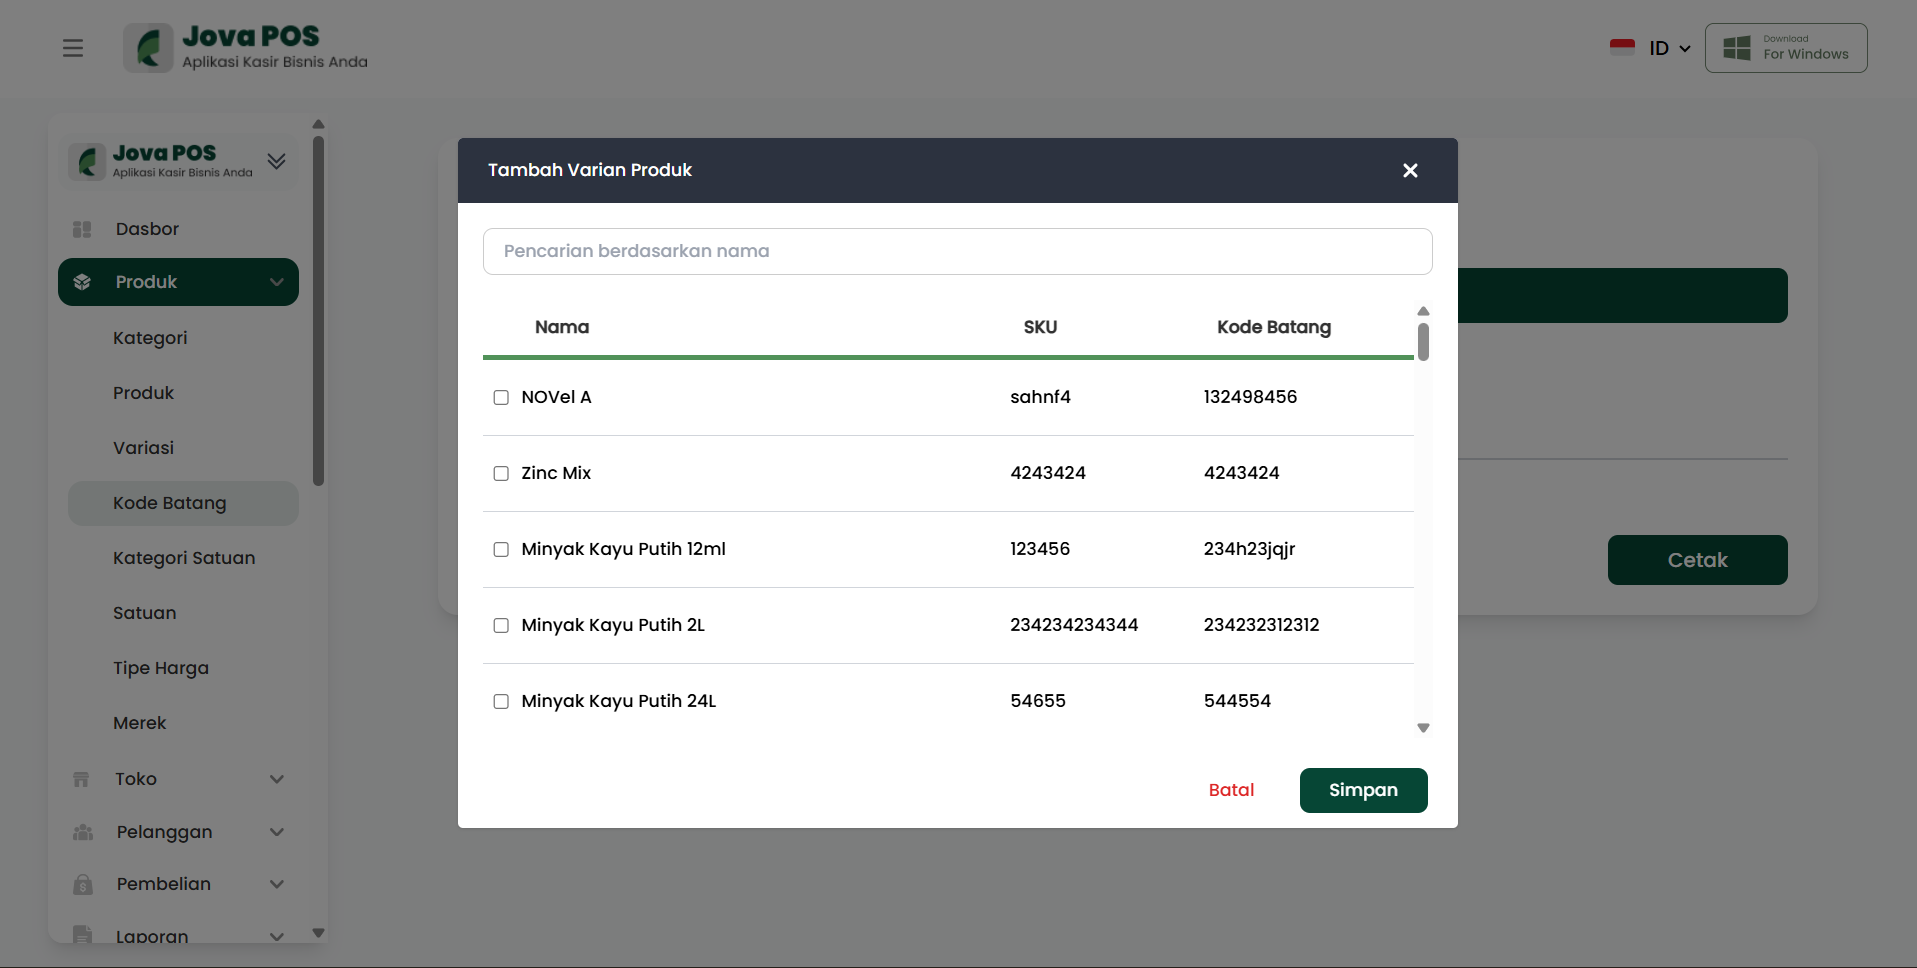
After selecting the product variant, you can choose the quantity of items to print barcodes for.
4. Fill in Quantity, Select Print Type (Product or Shelf), and Choose Barcode or SKU Print
After selecting the product variant, the next step is to fill in the quantity of products to print. Determine the number of products you want to print barcodes for in the Quantity column.
Then, select the type of barcode print to use:
- Barcode: Prints barcodes using standard format.
- SKU: Prints using the product SKU as the barcode.
Additionally, you can add products or shelves where the products will be placed. This is very useful if you want to group products by location or category in the warehouse or store. Select the appropriate shelf or category to place the barcoded products.
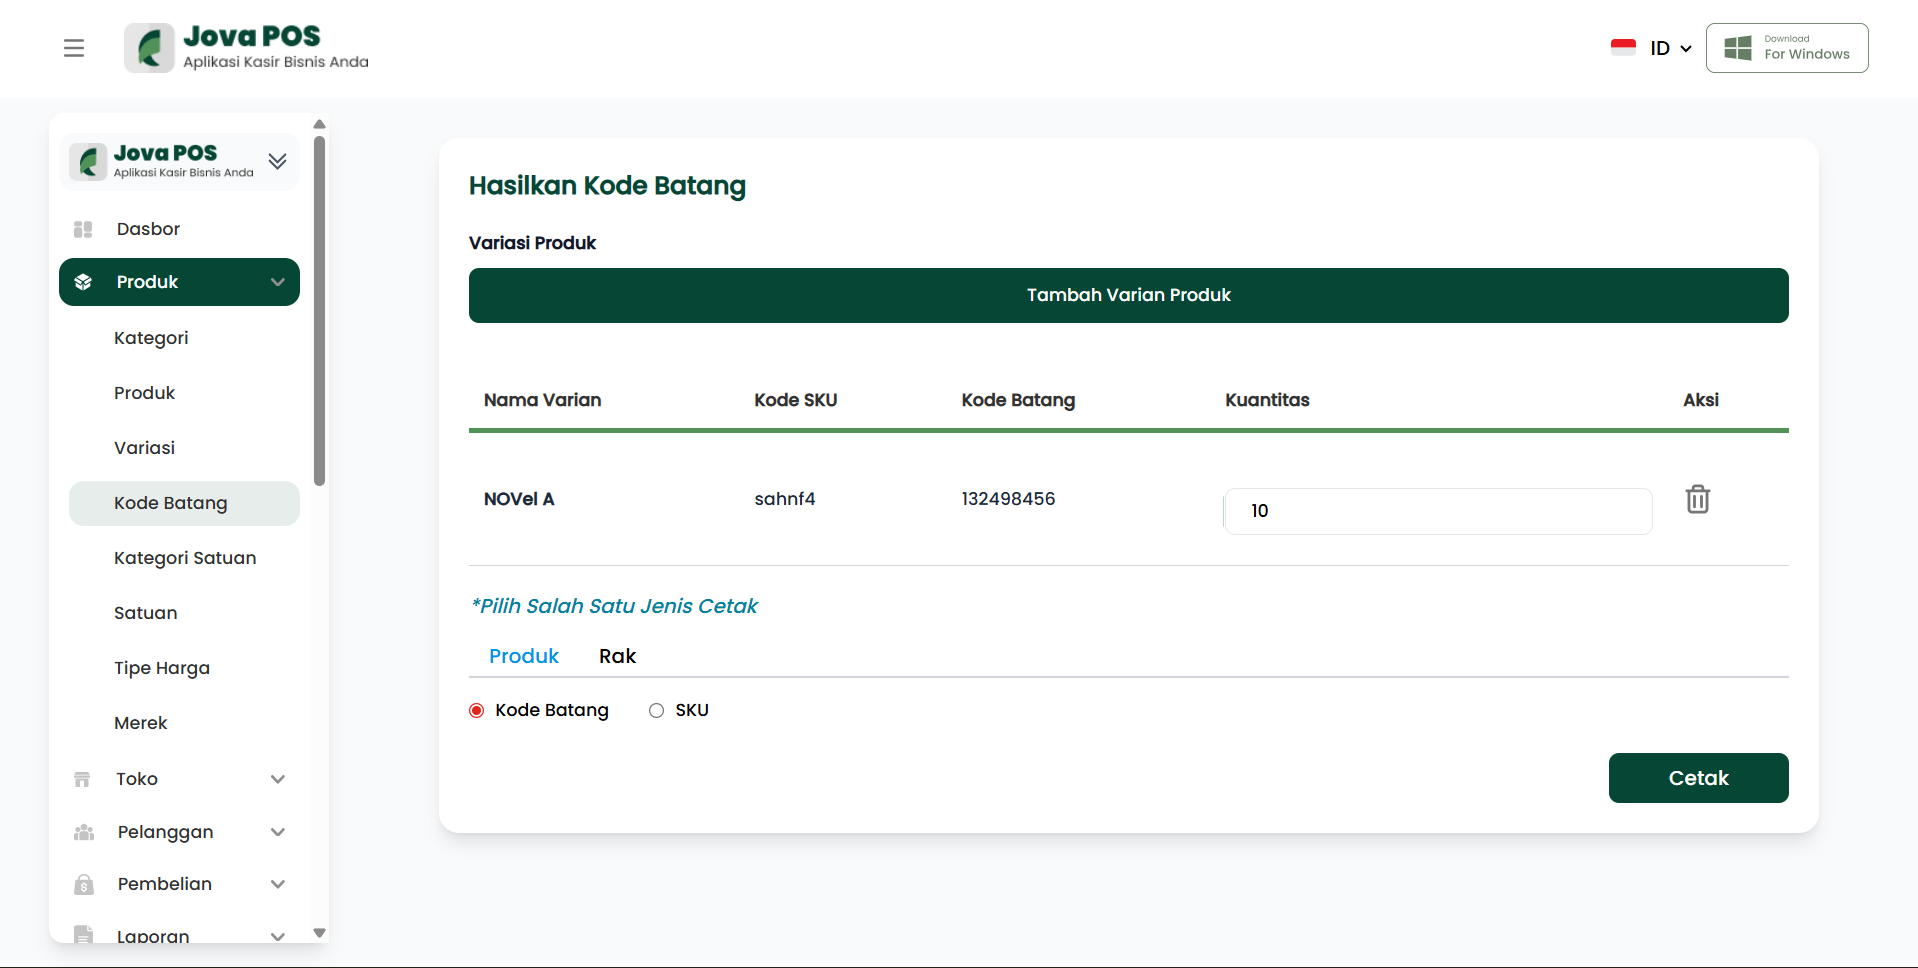
Steps:
- Fill in Quantity: Determine the number of products to print barcodes for.
- Select Print Type: Choose Product or Shelf as needed.
- If Product is selected, choose Barcode or SKU
- If Shelf is selected, choose Normal or Promotion option
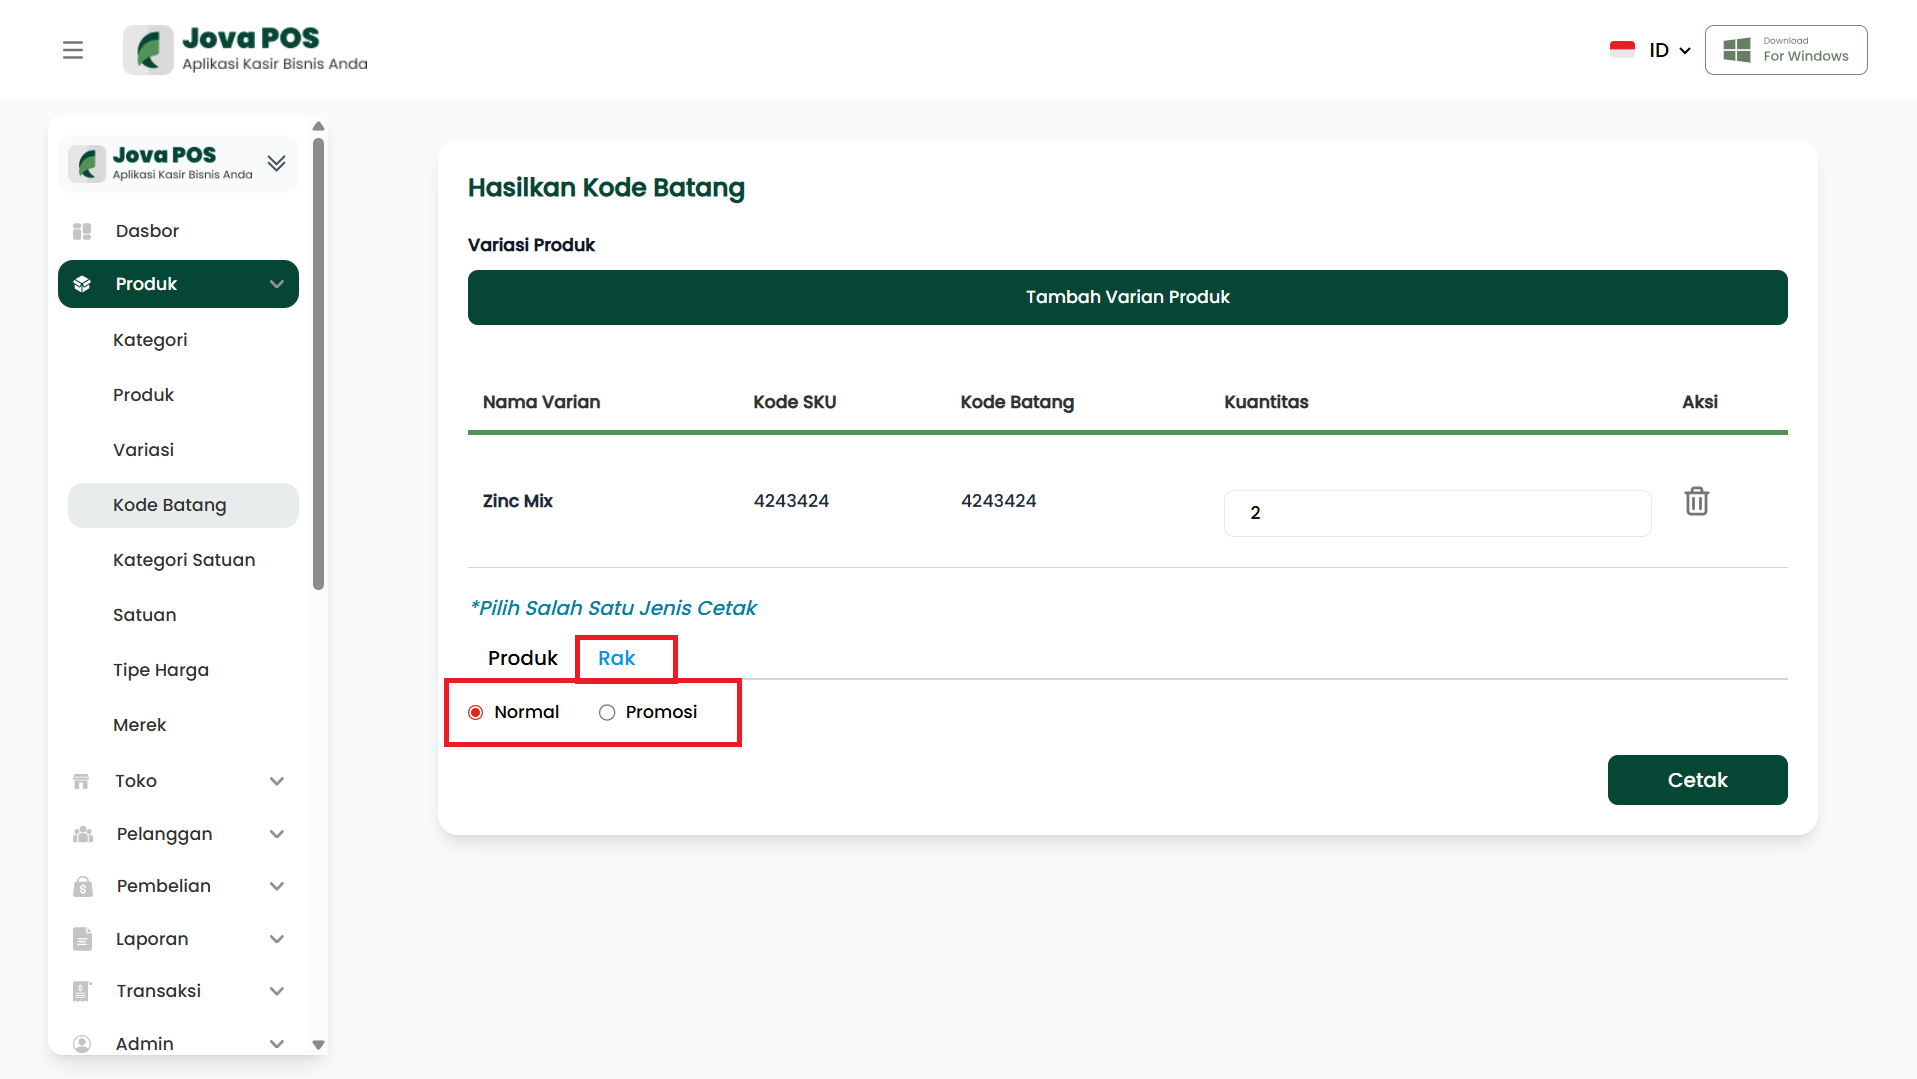
With this step, products are not only assigned barcodes but can also be grouped more easily on shelves or appropriate categories, improving stock management and product organization.
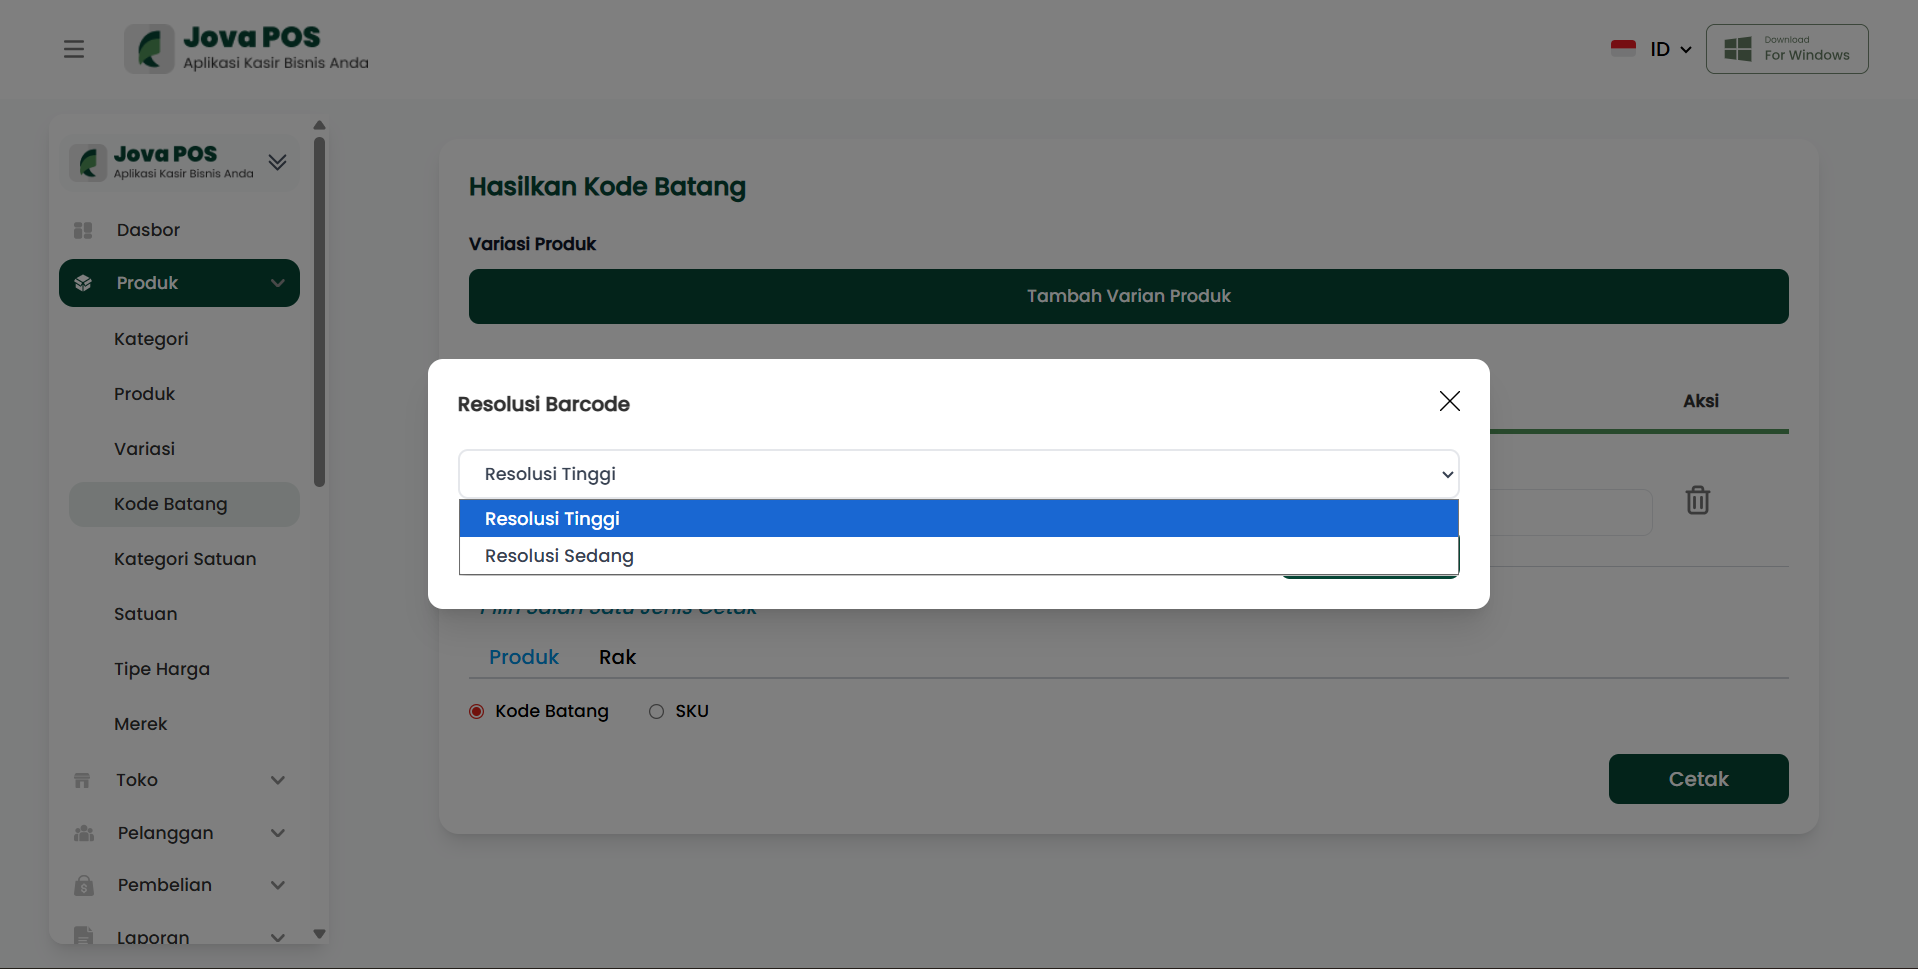
5. Select Barcode Resolution
After selecting the product variant, quantity, and print type, the next step is to select the resolution of the barcode to be printed.
There are two barcode resolution options to choose from:
- High Resolution: Produces barcodes with sharper and clearer print quality, suitable for small-sized prints or when higher sharpness is needed.
- Medium Resolution: Standard print quality that is good enough for daily use and more efficient in terms of time and ink usage.
Choose according to your printing needs.
6. Click "Print" to Generate Barcode
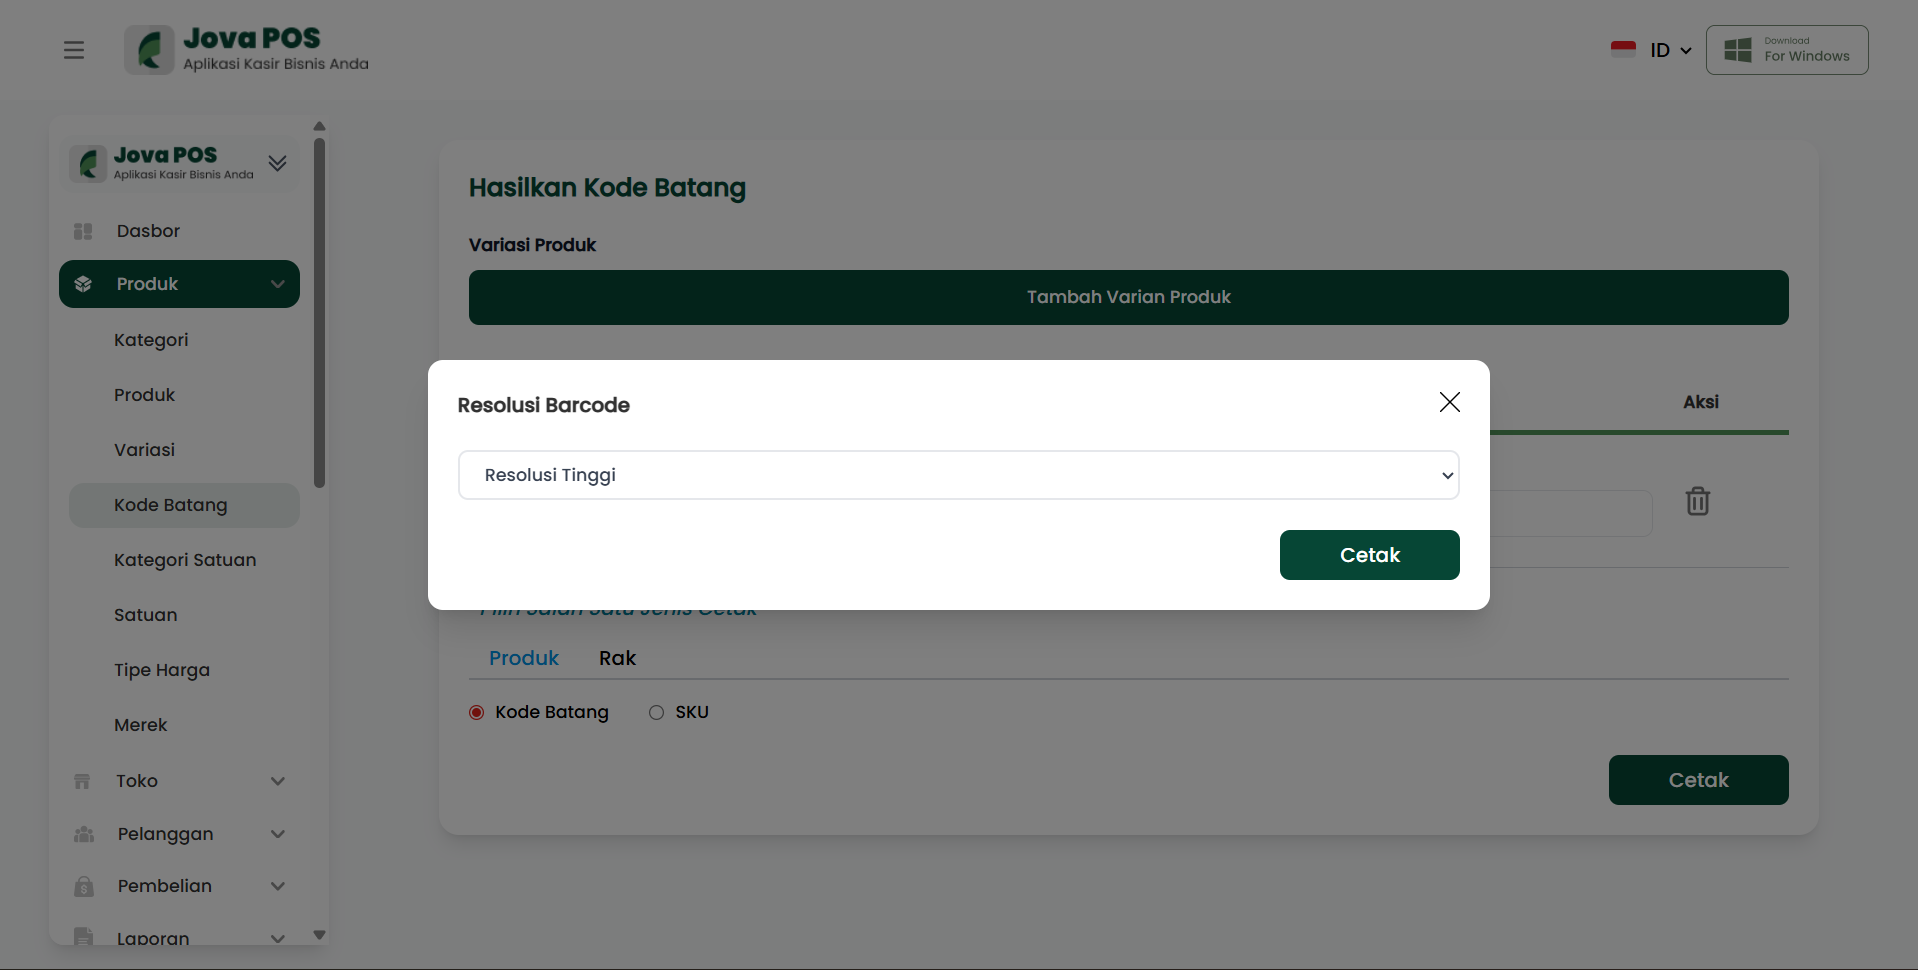
After filling in the quantity, selecting the print type, and choosing the resolution, the final step is to click the Print button to generate the barcode.
After pressing Print, the barcodes will be processed and printed according to the settings you have selected. You can check the printed barcodes and ensure everything prints correctly.
View after clicking Print:
7. Barcode Print Results
After the printing process is complete, you will see the printed barcode results. Below is an example of the printed barcode display:
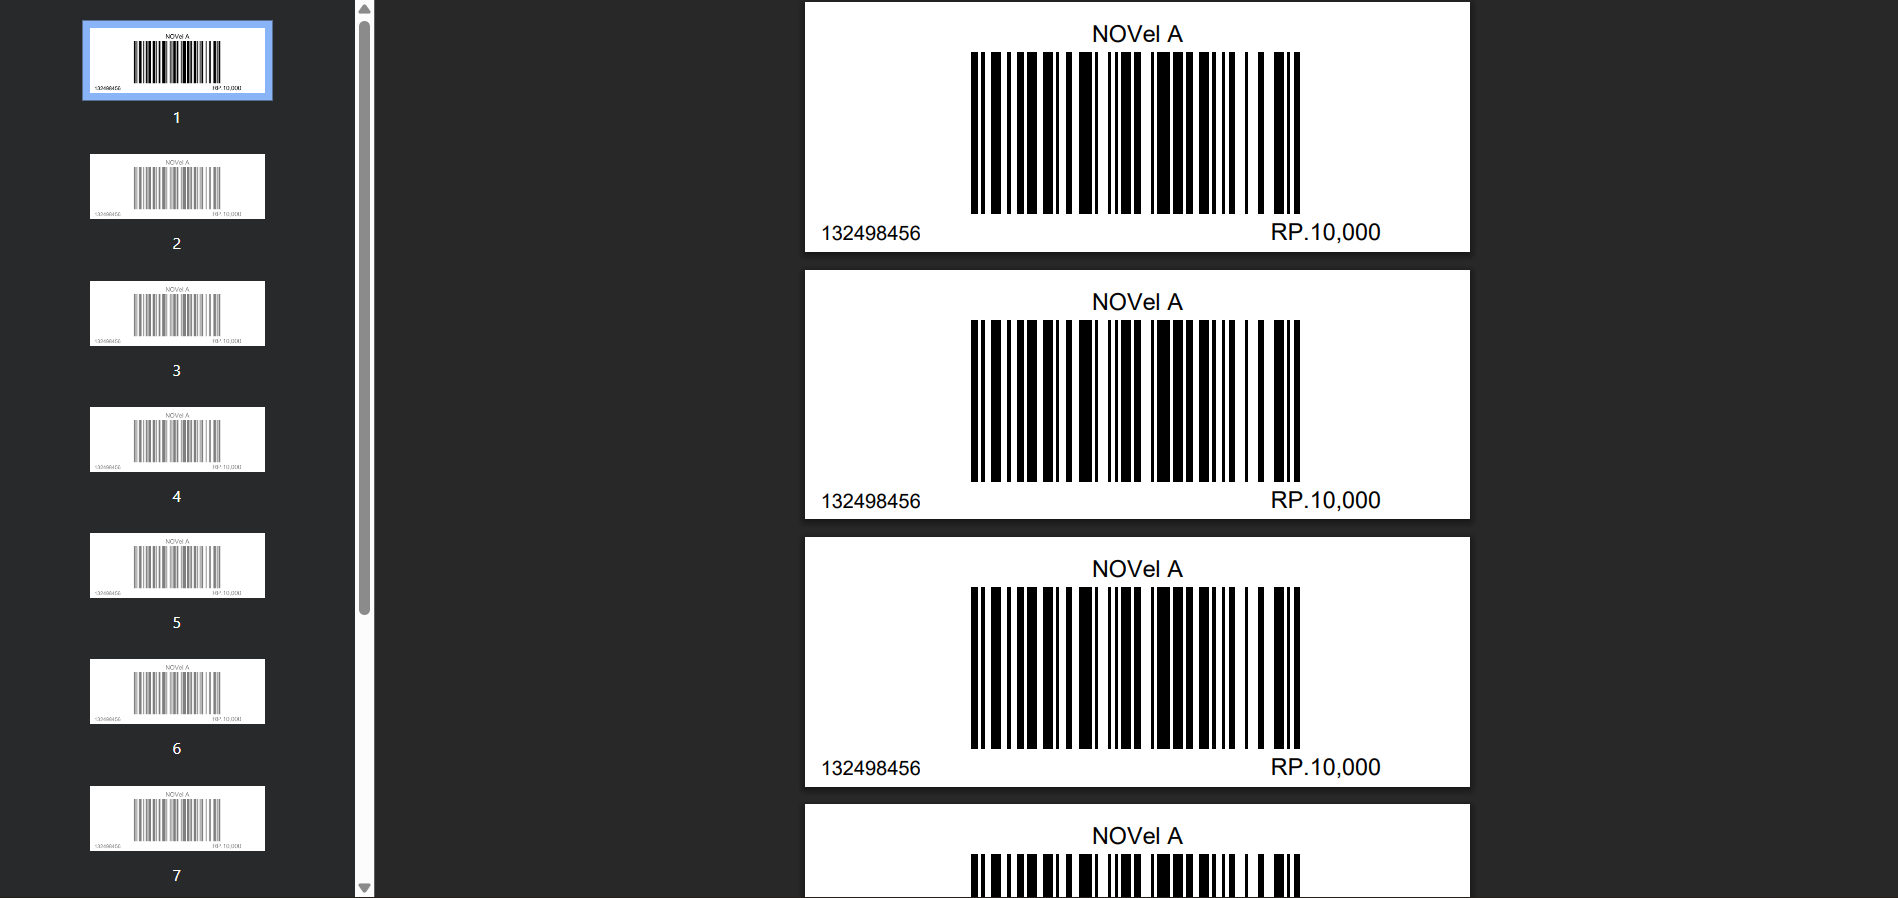
On this page, you will see each printed barcode, complete with product number, price, and product name. The printed barcodes are ready for use in the store or warehouse.
- Product Number: A unique number used to identify the product.
- Price: Price information for the printed product.
- Product Name: The name of the product variant connected to the barcode.
Check the print results to ensure that all printed data is correct and clearly readable by the barcode scanner. If there are print quality issues, such as blurry or unreadable barcodes, consider selecting a higher resolution in the previous step and reprinting.
Barcode Printing Process
- Select Product Variant: Choose the product to be assigned a barcode.
- Fill in Quantity: Determine the number of products to print barcodes for.
- Select Print Type: Choose between Product or Shelf.
- Select Resolution: Choose High Resolution or Medium Resolution for print quality.
- Click Print: Click the Print button to generate and print barcodes.
- View Print Results: Check the printed barcodes to ensure all data is printed correctly.
Benefits of Using Barcodes
- Transaction Speed and Accuracy: Speeds up the transaction process and reduces the risk of errors in price calculation.
- Better Stock Management: Simplifies real-time product stock recording and tracking.
- Ease of Product Management: With barcodes, you can more easily identify and manage products in the system.
- Increased Professionalism: Using barcodes gives a professional impression to customers, as your store or business is well organized.
Conclusion
The Barcode feature in JOVA POS is very helpful in product management and speeding up the sales transaction process. By setting the barcode resolution and print type, users can generate quality product barcodes that suit their business needs. Barcodes also make stock management easier and ensure transactions run accurately and efficiently.
Troubleshooting
- Barcode Not Readable: Make sure the barcode is printed with high resolution and good printer quality.
- Product Error: If the barcode does not match the product, double-check the product variant selection before printing.